
Developing Business Central Extensions (part 3) – Build Pipeline
Update 2021/2/10: Microsoft stopped creating images for Docker in the summer of 2020. We now publish artifacts, which can be used to spin up containers and BcContainerHelper has replaced NavContainerHelper. This blog post reflects the old way of using NAV/BC on Docker and references NavContainerHelper, which is outdated.
If you haven’t read part 1 and part 2, you should do so before continuing here. Part 1 contains all the prerequisites and part 2 is about cloning the project and get your sandbox environment up running.
Create a build agent
In order to setup continuous integration, we need a machine which can perform the actual build asks for us, the build agent.
A build agent consists of a Windows Server 2016 with some software installed: Docker, NavContainerHelper and the Azure DevOps Agent. You will also need to configure the build agent to access your organization.
I have created an ARM template, with which you can create a build agent.
The Url to this template is http://aka.ms/getbuildagent
or you can create a Windows Server 2016 and install the components manually:
- Docker EE (https://docs.docker.com/install/windows/docker-ee/)
- NuGet Package Provider 2.8.5.201 or higher (https://www.nuget.org)
- NavContainerHelper (https://www.powershellgallery.com/packages/navcontainerhelper)
- Azure DevOps Agent 2.141.1 installed and configured (https://docs.microsoft.com/en-us/azure/devops/pipelines/agents/v2-windows?view=vsts)
The script, which performs these steps for the ARM template can also be downloaded and used. You will find it here: https://github.com/Microsoft/nav-arm-templates/blob/master/initbuildagent.ps1
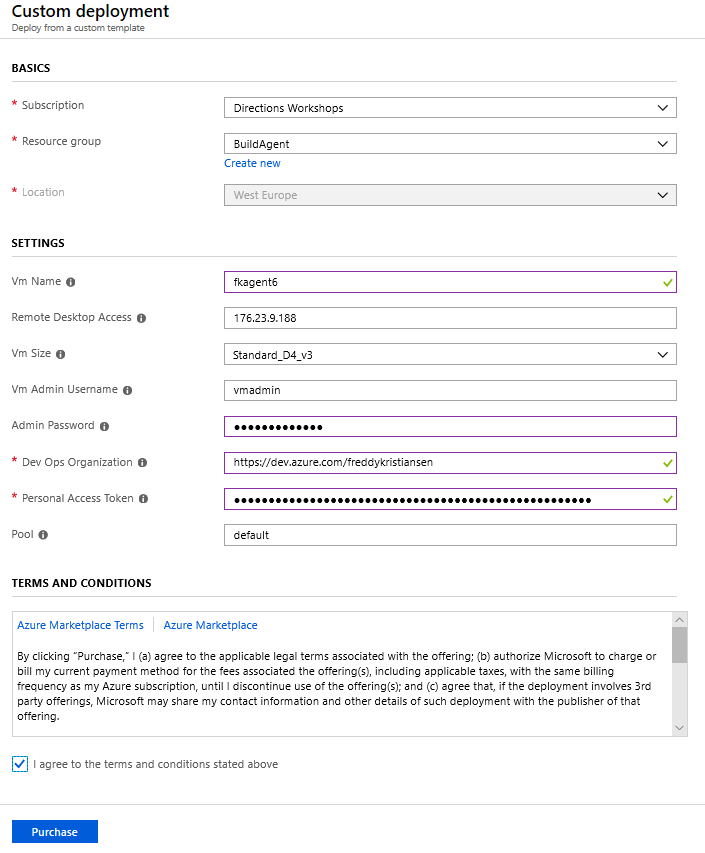
In both cases you will need a Personal Access Token for your Azure DevOps Organization in order to setup a build agent.
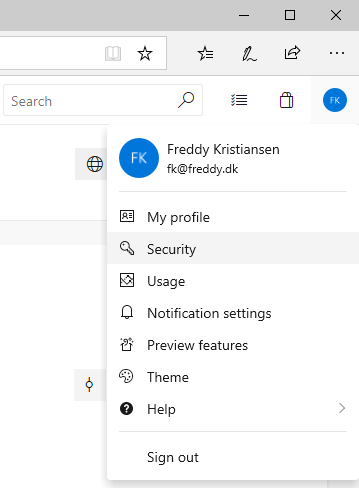
Open your Azure DevOps organization (eg. https://dev.azure.com//) and click your avatar and select Security
In the Personal Access Tokens list, you can revoke tokens, regenerate them or edit scope, expiration date and more.

Select New Token, give the token a name, an expiration date, click show all scopes to reveal Agent Pools and select Read & manage.
Click Create and you will see the token one time and one time only. You will need to copy the token.
Note: You can use the same token for multiple agents.
For the automated build agent setup, open http://aka.ms/getbuildagent and specify size, location, your organization and the Personal Access Token.
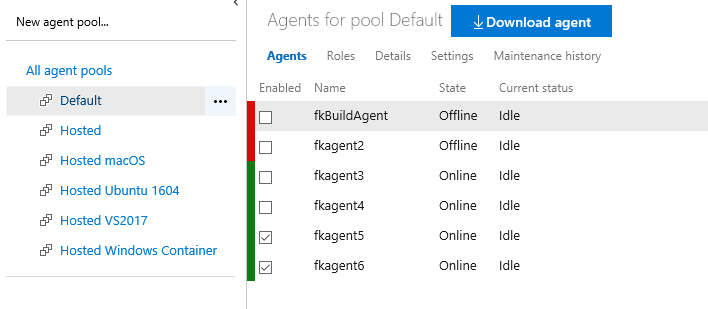
After 15-20 minutes, you should see your new agent popping up (https://dev.azure.com//_settings/agentpools), ready to serve you:
Access your secrets in the build system
In part 1, we created an Azure KeyVault, with a number of secrets (password, license file etc.). We need these secrets in the build and fortunately, Azure DevOps has a nice way of getting to those.
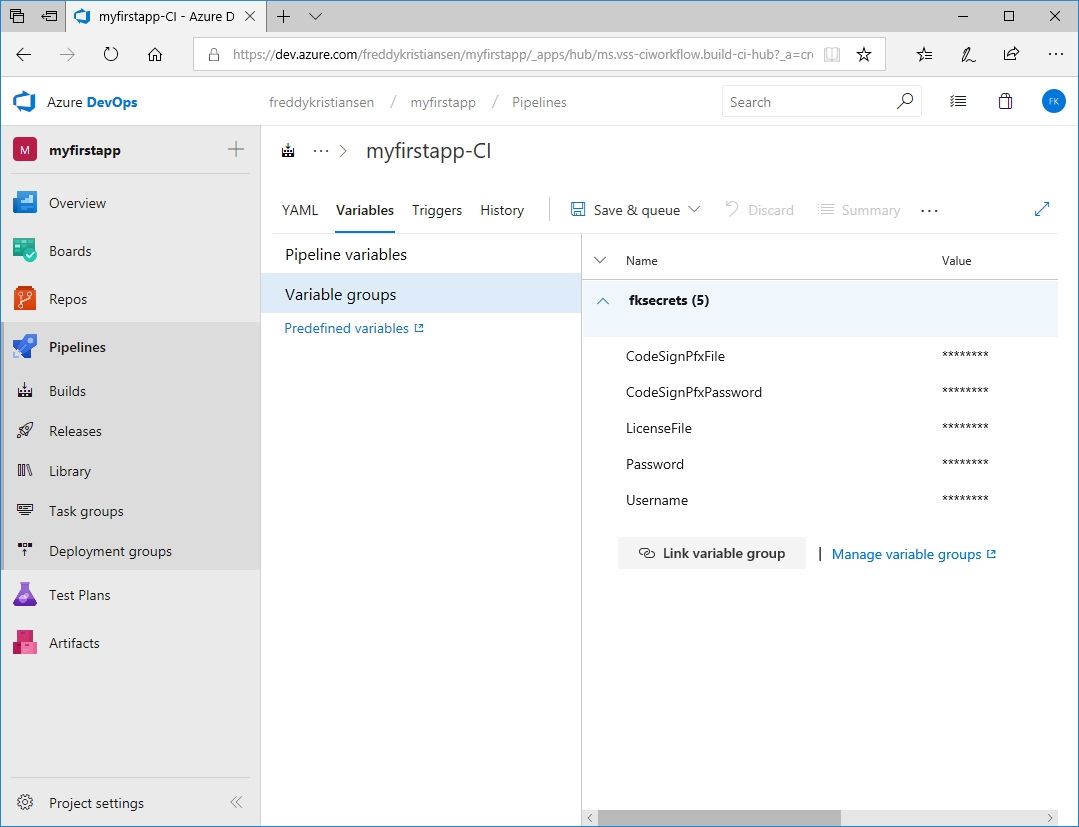
In Azure DevOps, under your Project, select Pipelines -> Library.
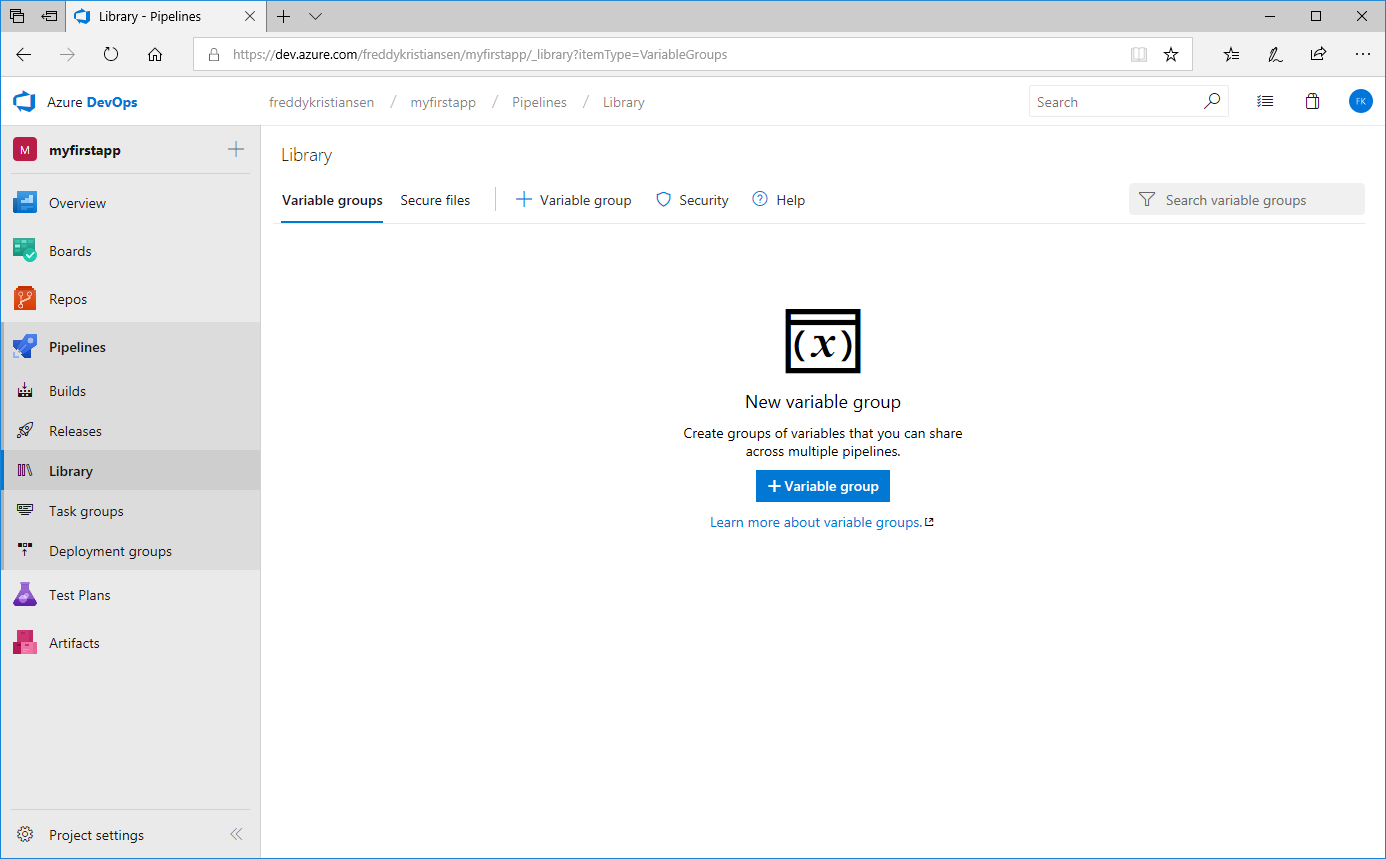
Click + Variable group to create a variable group. Name the variable group and select Link secrets from Azure key vault as variables.
Specify the subscription (you will need to authenticate), select the key vault and add the variables
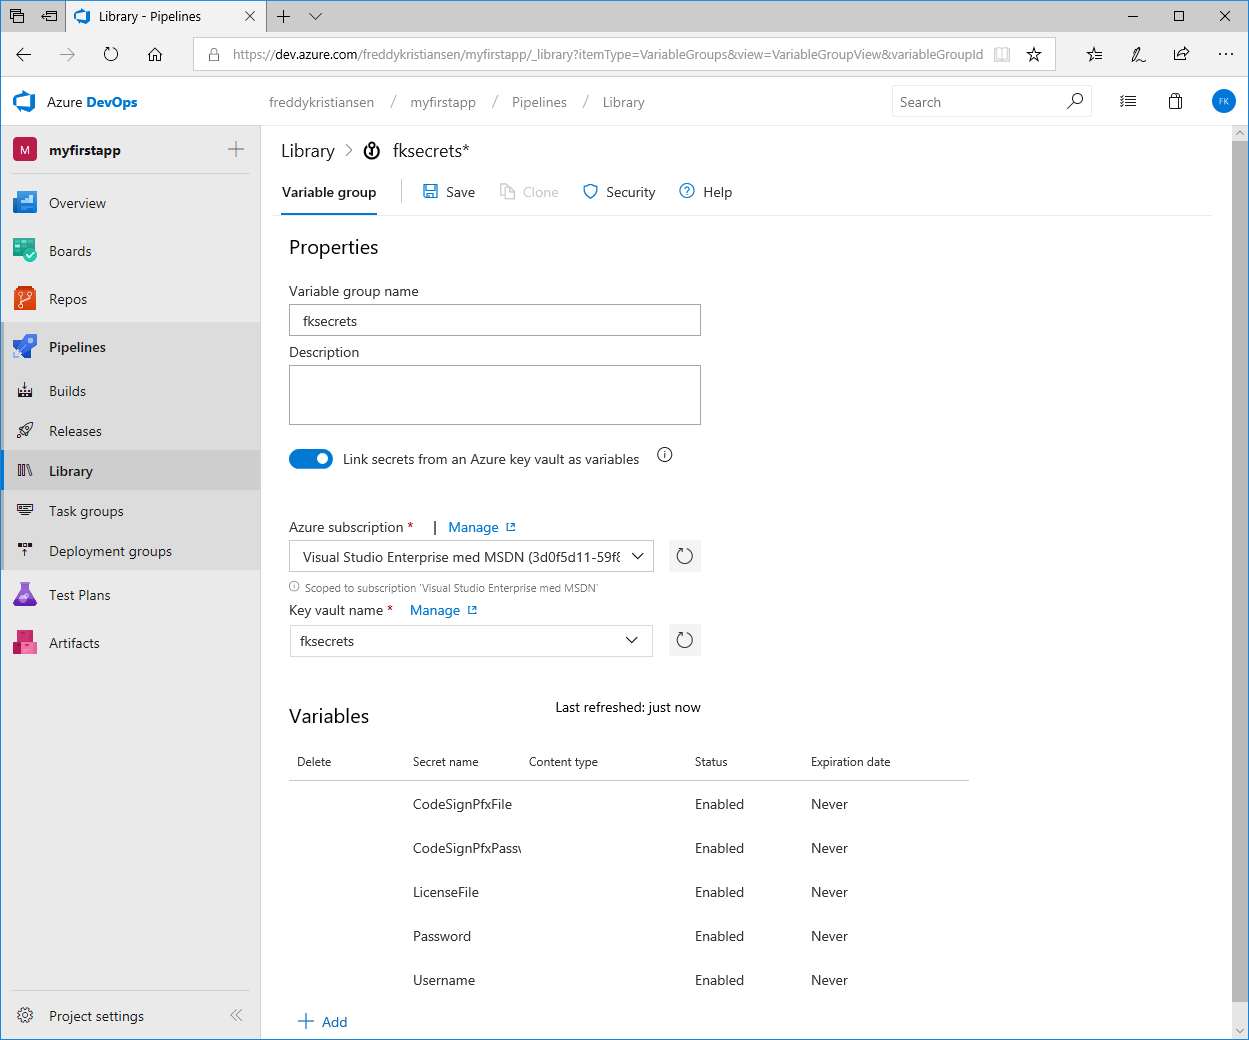
These variables will now be available for the build tasks if you link the variable group to the pipeline.
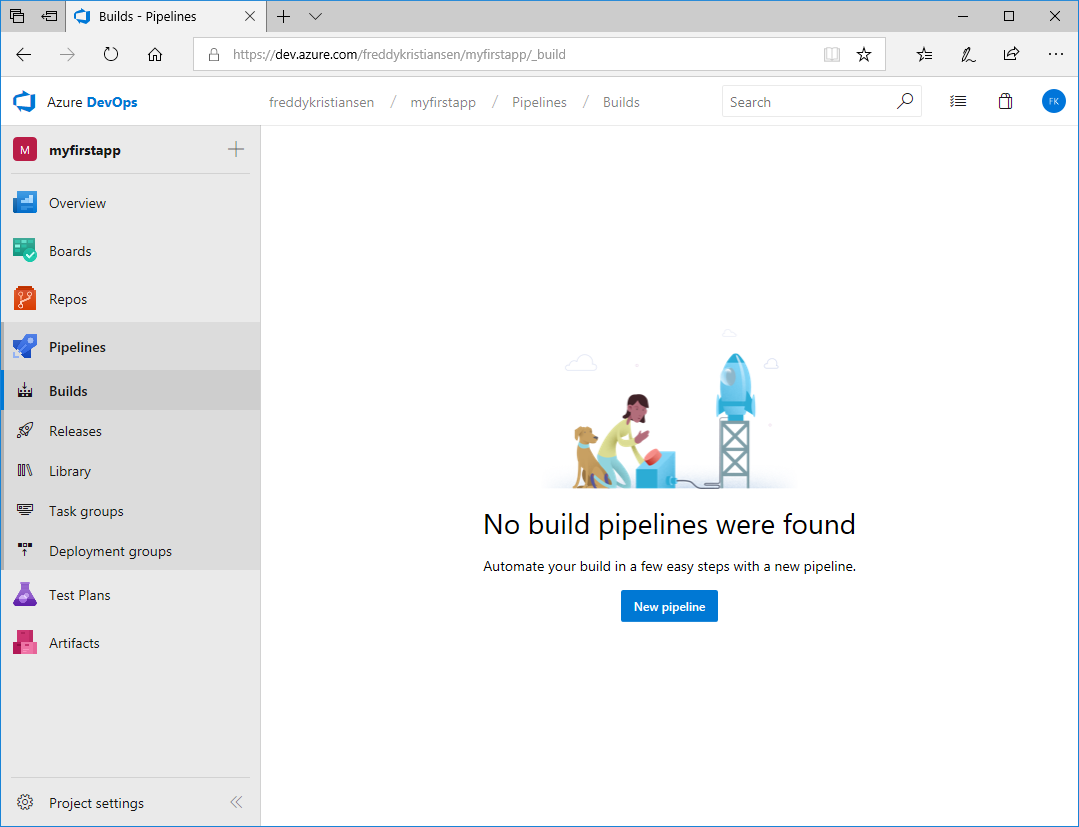
Create a build pipeline
In Azure DevOps, under your Project, select Pipelines -> Builds. You will likely see that you have no build pipelines:
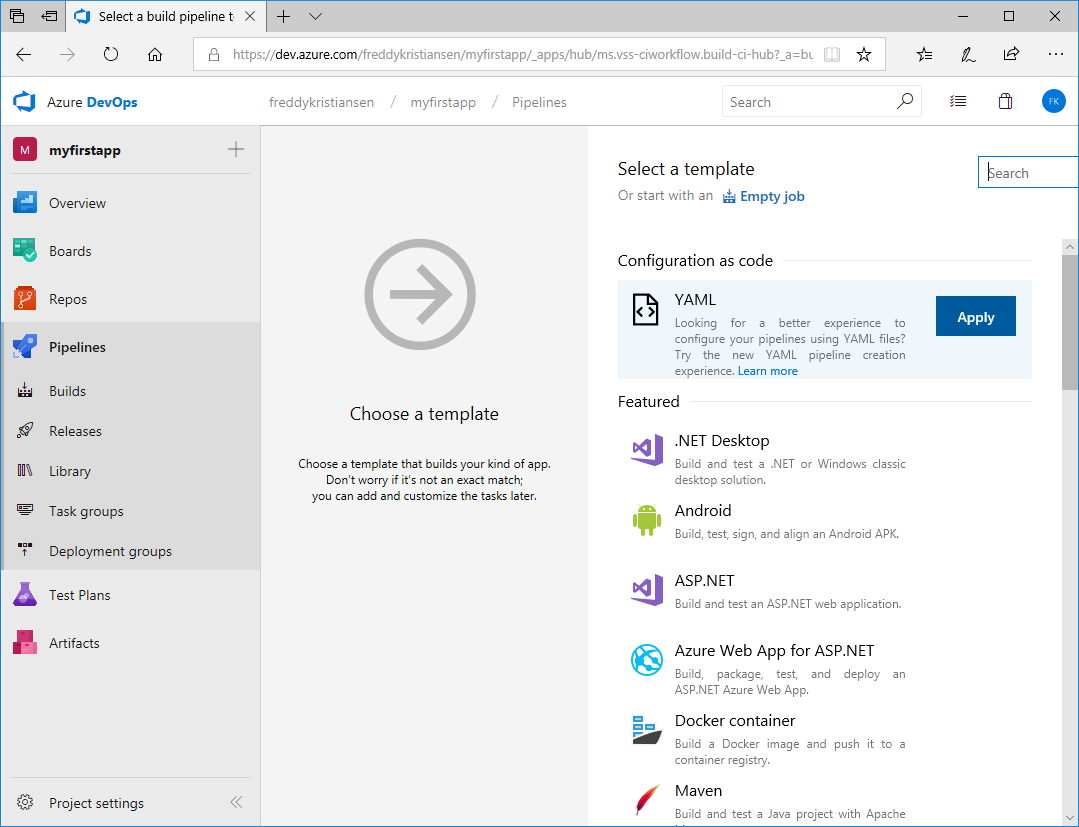
Click New pipeline and click Use the visual designer. Select your repository:

Continue and select the YAML template under Configuration as code.
Select the Default Agent pool and select the CI.yml file (included in the repository)
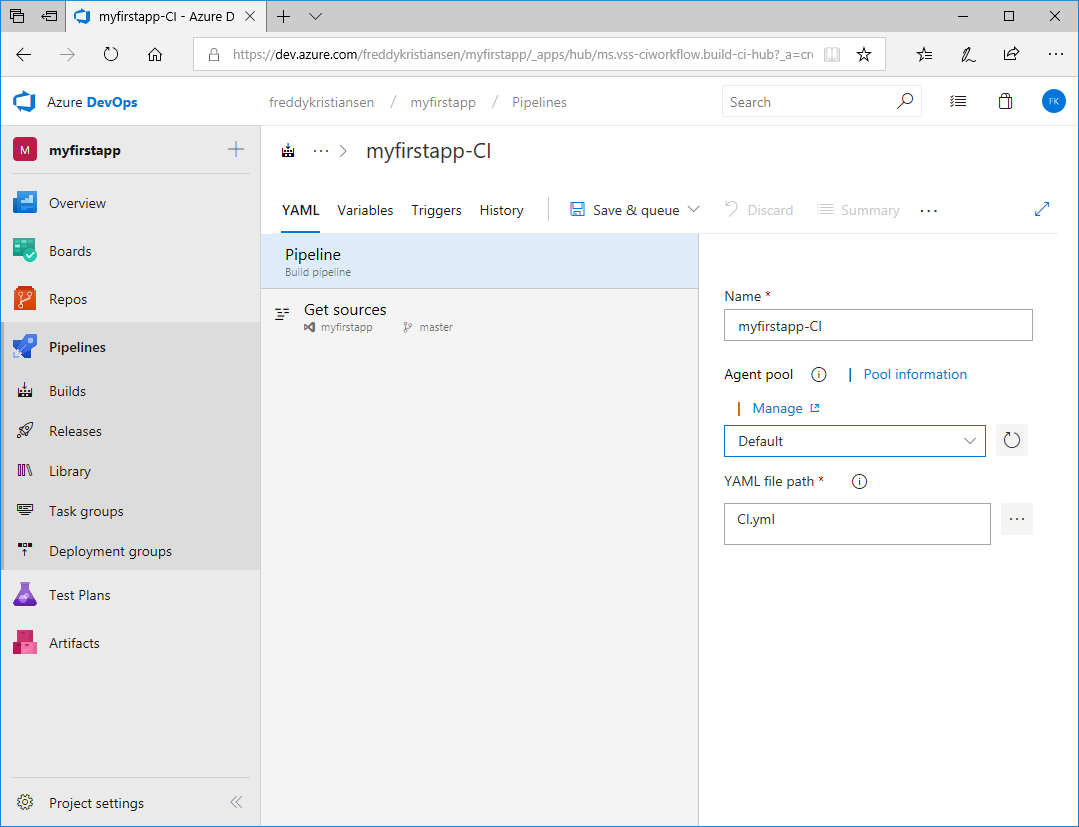
Select Variables, Variable Groups, Link variable group and Link your variable group you created above to the pipeline.
Click Save & queue and queue a build. You can click the link of the build to see the log…
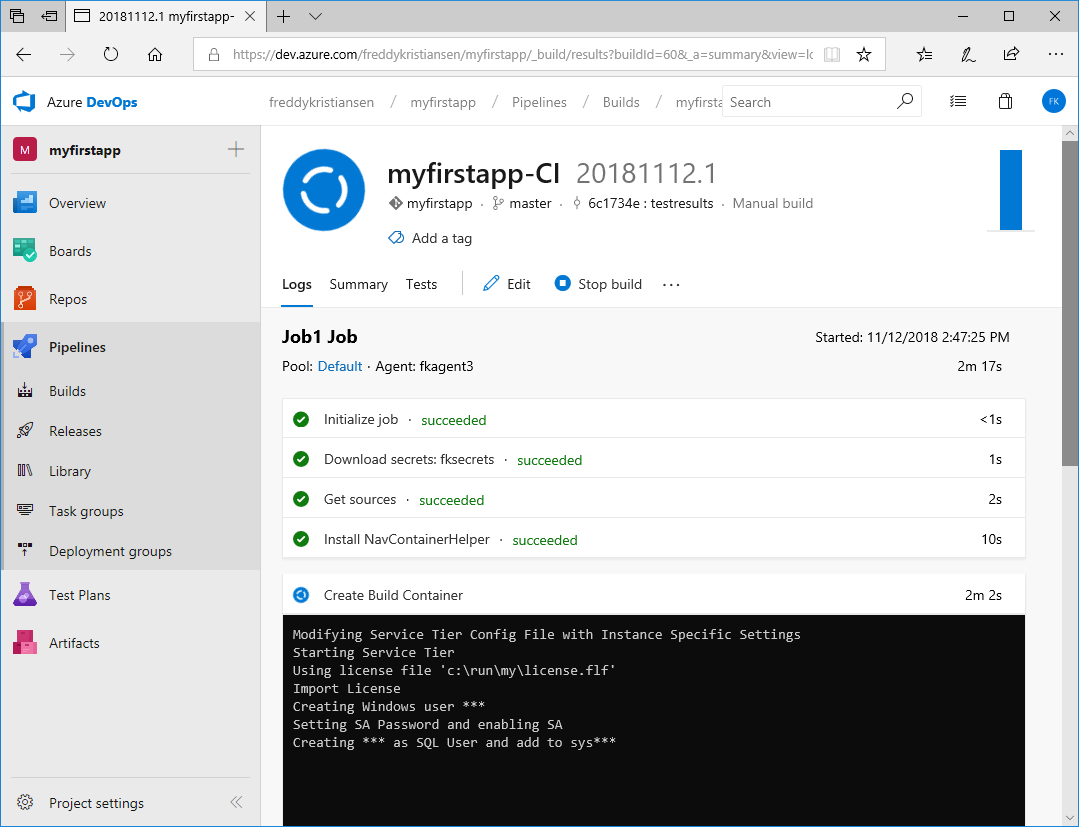
Note: The first time you run a build on the agent, it will take significantly longer because it needs to pull the Business Central Docker image.
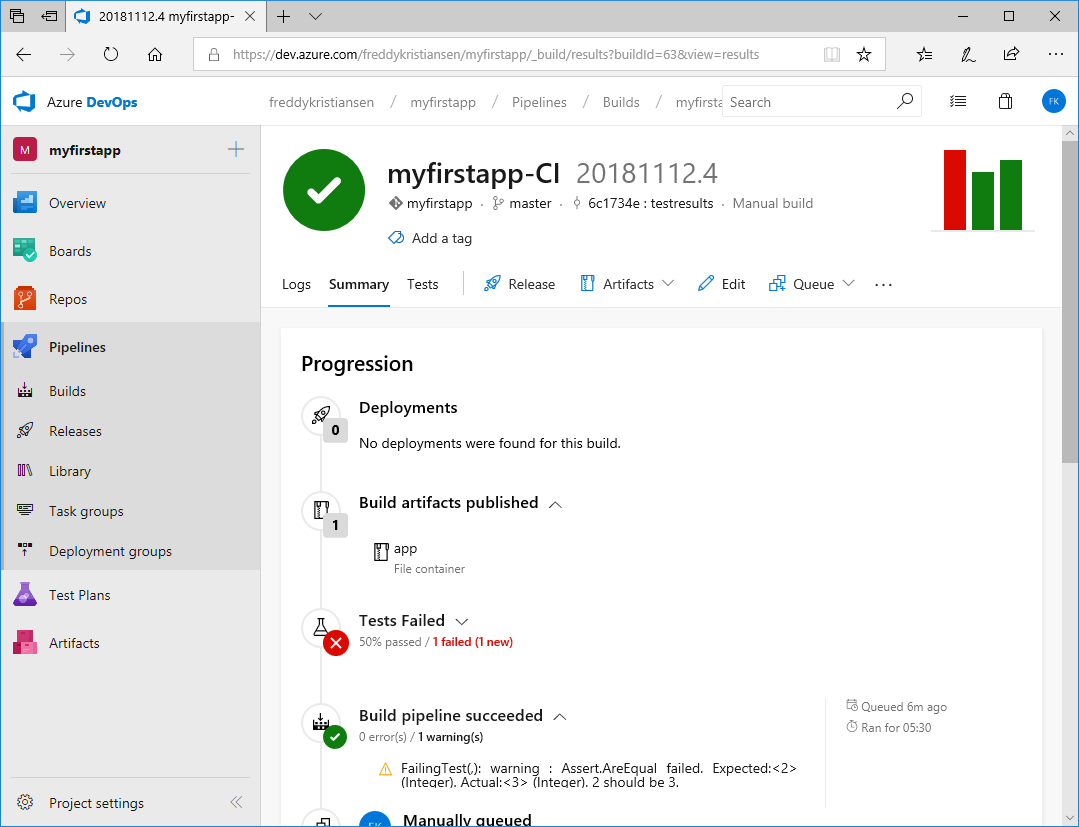
After some time, you should see your build successfully completed and one failing test.
A few words about Tests
Update February 27th – the helloworld template repository has been updated with a new way of running tests – a special blog post on test execution will be added to this series soon.
I should mention here, that the way tests are executed in the repository while writing this blog post is still work in progress. Currently the setup just invokes a Codeunit in a container and there are multiple reasons why this isn’t sufficient. We are working on making a better approach to this and I will include this in a later blog post.
What’s next
Now, we have our source in Azure DevOps and we have local and hosted builds running.
In the next Blog Post we will setup checkin policies with code reviews and pull requests – and we will create a few more pipelines for testing our app against insider builds.
Enjoy
Freddy Kristiansen
Technical Evangelist